Regrowing scallions from kitchen scraps is a brilliant way not just to reduce waste, but also to always have fresh greens ready in your kitchen. Scallions, also known as green onions, have a phenomenal ability to regenerate from their white roots. That’s right, the part you usually discard can actually yield a brand new plant!
Here are the basic elements necessary for regrowing scallions from your kitchen scraps:
- The bottom part (white- to pale-green portion) with roots still attached.
- A container filled with water or pot with soil
- A location that gets ample sunlight
**Pro tip:** Always opt for fresh and healthy scallions. Signs of a good pick include a bright color and firm texture. A rotten or wilted scallion is less likely to yield successful regrowth.
**Step-by-Step Guide on Regrowing Scallions from Kitchen Scraps**
You’d be amazed to know that it takes only a few simple steps to start seeing new greens sprouting. Here’s how it works:
- Keep the white part of the scallions with roots after using the green part in your cooking.
- Place them root down in a small container filled with enough water to cover the roots.
- Put the container in a well-lit area, like a windowsill that gets plenty of sunshine.
- Change the water every one to two days to prevent the scallion roots from rotting.
- Await sprouts! In about two weeks, your scallions should regrow to almost their original size.
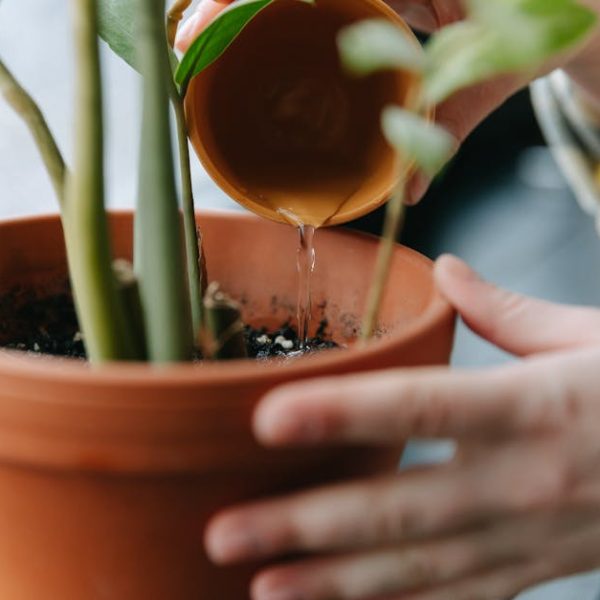
**Best practice:** While handling the scallions, be gentle to avoid damaging the roots. Damage might hinder the regrowth process. Also, if you’re growing them in soil, ensure the soil remains constantly but lightly moist, not waterlogged.
**Creating a Suitable Environment for Scallion Regrowth**
The right environment is crucial for the healthy regrowth of scallions. Adequate light, correct temperature, and proper watering are all parts of this. Purely indoor or outdoor environments have their advantages and disadvantages:
| **Indoor** | **Outdoor** |
|---|---|
| Less dependency on weather conditions | Natural sunlight that promotes growth |
| Easier to control watering and prevent overwatering | Natural rainfall can contribute to watering needs |
| Limited space might restrict growth | More space for the plants to grow |
**Pro tip:** Regardless of where you grow your scallions, ensure they get enough sunlight. If growing indoors, rotate the plant occasionally so all parts get equal exposure to sunlight. **Maintaining Scallion Regrowth**
Once you’ve started the regrowth process, you need to ensure the plant’s environment continues to nurture its growth correctly. Essential cues of healthy regrowth include robust green shoots and roots that dig into their growth medium.
You might encounter common issues like yellowing tips or stunted growth. Here’s how to tackle them:
- **Yellowing tips:** This might be a sign of overwatering. Remember, scallions love moisture but not waterlogging.
- **Stunted growth:** Potentially due to inadequate sunlight. Make sure your scallions get enough light daily.
**Best practices:** Apart from ensuring proper watering and sunlight, habits like light mulching around the plant can keep its roots cool and moist, fostering healthy growth.
**Using Your Regrown Scallions**
Harvesting your regrown scallions is as simple as snipping off what you need from the green section, making sure you leave approximately one inch of the green part for continued growth.
Here are some ideas for dishes that make good use of scallions:
- Stir-fries
- Korean pancakes
- Soup garnishing
- Scallion flavored oil
**Store-bought vs Regrown Scallions – a Cost and Taste Comparison**
| **Store-bought Scallions** | **Regrown Scallions** |
|---|---|
| More expensive in the long run | Can be regrown endlessly from the same plant |
| Might not be as fresh | Always available fresh from your kitchen garden |
**Pro-tip:** After harvesting, store your fresh scallions in a plastic bag in the fridge. They should retain their taste and texture for about a week. Enjoy the fulfilling experience of cooking with scallions you’ve grown yourself from scratch!
Key Takeaway:
- Regrowing scallions from kitchen scraps is a cost-effective, sustainable process that guarantees a constant supply of fresh greens.
- The process involves using the white root part of the scallion, immersing it in water or planting in soil, and exposing it to ample light.
- Proper maintenance, including regular water change, relative watering in soil, and ensuring enough light can promote healthy regrowth.
- The regrown scallions can be used in various dishes and have advantages over store-bought ones in terms of cost-effectiveness and freshness.
Nurturing regrown scallions is not just a creative and sustainable gardening activity, but can also bring fulfillment in using fresh, home-grown produce in your meals. An understanding of the fundamental techniques and best practices of this process can yield successful results.
FAQs
Q: Can other vegetables be regrown from kitchen scraps?
A: Yes, apart from scallions, several other vegetables like lettuce, celery, and garlic can be regrown from kitchen scraps using similar principles.
Q: What if my regrown scallions do not grow as expected?
A: There could be several causes for this, such as insufficient light, excessive or insufficient watering, or poor quality scraps. Try altering these factors to improve growth.
Q: Are regrown vegetables nutritionally as good as their store-bought counterparts?
A: Absolutely. As long as they are grown and cared for in the right conditions, regrown vegetables should maintain their nutritional value.
Q: Can I regrow scallions in a garden instead of a container?
A: Certainly, scallions can thrive in both container gardens and traditional garden soils. Just ensure they get ample sunlight and optimal watering.
Q: What’s the best time of the year to start regrowing scallions?
A: Scallions are hardy and can be regrown anytime during the year. Nonetheless, they thrive best in warm, but not too hot conditions.
Share this article with friends and family looking to venture into sustainable kitchen gardening, and explore more posts on our website for other clever gardening hacks.