Whether you’re a seasoned gardener or just a beginner, growing squash plants in your home garden can be a fulfilling experience. Not only are squashes delightful to eat, but these plants are also versatile, hardy, and produce plenty with the right care. To do this, you need to ensure they receive the necessary nutrients, and what better way to do this than with DIY terrific squash plant food? This homemade fertilizer, crafted with care and precision, will satisfy your squash plants’ nutritional needs, boost their growth, and ensure a bountiful harvest.
Understanding the Nutritional Needs of Squash Plants
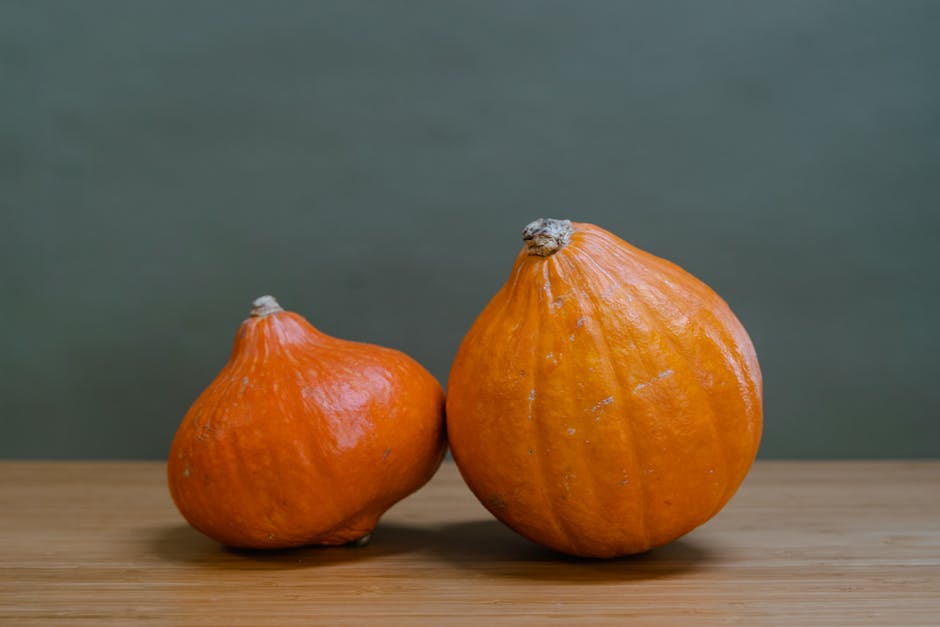
Squash plants, part of the Cucurbitaceae family, have their unique set of nutritional requirements. They demand more nutrients than your average vegetable plant, predominantly Nitrogen (N), Phosphorus (P), and Potassium (K).
Comparison:
When compared to other common garden vegetables, squash plants require higher levels of these macronutrients. Here’s a comparative table:
| Squash | Tomatoes | Cabbage | |
|---|---|---|---|
| Nitrogen (N) | High | Medium | Low |
| Phosphorus (P) | High | Medium | Medium |
| Potassium (K) | High | High | Medium |
Pro Tip:
Keep an eye out for signs of nutrient deficiencies. Yellowing leaves? That might mean your squash plant needs more Nitrogen. Slow growth or lower yield? This could indicate a lack of Phosphorus. Use such signs to effectively tailor your homemade fertilizer to meet their exact needs.
The Essential Components of Squash Fertilizer
Making a homemade squash fertilizer is quite simple and resourceful. You can use everyday household waste that would otherwise be chucked in the bin.
List:
Here are the key ingredients for a nutrient-rich homemade squash fertilizer and the specific nutrients they provide:
- Coffee Grounds: Every morning’s leftover can be a Nitrogen-rich additive to your DIY fertilizer.
- Banana Peels: With their high Potassium content, banana peels are a boon for squash plants.
- Bone Meal or Crushed Eggshells: Both are excellent sources of Phosphorus.
Best Practice:
Collect and store these ingredients separately in your home. The trick lies in allowing these components to decompose before use, for which a lidded container, kept away from direct sunlight, works wonders.
- Continuation in the next section…
How to Make Your Own Squash Fertilizer at Home
With your ingredients ready, it’s time to get your hands dirty and mix up your very own squash plant cuisine!
Checklist:
Here’s a detailed checklist that breaks down each step in the DIY fertilizer creation process:
- Gather your ingredients: Coffee Grounds, Banana Peels, and Bone Meal/Crushed Eggshells.
- Allow the Banana Peels to dry out; this makes them easier to handle and grind.
- Use a blender or coffee grinder to pulverize your ingredients into a fine powder.
- Mix the ground ingredients in a ratio of 30% Coffee Grounds, 30% Bone Meal/ Crushed Eggshells, and 40% Banana Peels.
- Store your mixed fertilizer in a lidded container, preferably away from sunlight and in a cool, dry area.
Pro Tip:
To help your plants absorb these nutrients effectively, try mixing your homemade fertilizer with compost. It not only enhances the nutrient content but also improves the soil’s texture and water-holding capacity.
Squash Fertilizer Application: When, Where, and How Much
Unlike store-bought fertilizers, homemade squash plant food is gentle on your plants. Meaning, you have more flexibility when, where, and how much you apply and less risk of fertilizer burn.
Best Practice:
Apply your homemade squash fertilizer:
- At planting time: A spoonful at the base of each planting hole will give your seeds or seedlings a running start.
- During the growth period: Sprinkle a little around the base of the plant once every two weeks.
- Before flowering: Generously apply around the plants just before they start to blossom.
Versus:
Let’s see how DIY squash plant food stacks up against commercial squash fertilizers.
| DIY Squash Plant Food | Commercial Squash Fertilizers | |
|---|---|---|
| Cost | Almost nothing (made from household waste) | Can be expensive, depending on the brand and quantity |
| Environmental Impact | Eco-friendly (reduces waste and requires no manufacturing) | Can contribute to soil and water pollution due to synthetic ingredients |
Maintaining Squash Plant Health Beyond Fertilization
Fertilizer, even one as terrific as your homemade mix, is just one aspect of the bigger picture of plant health.
List:
Here are additional care techniques that contribute to successful squash growth:
- Watering: Consistent moisture is necessary for healthy squash plants, without waterlogging them.
- Pest management: Pests such as squash bugs and vine borers can be a threat, so regular checking and organic pest control methods can help.
- Sunlight: A minimum of six hours of sunlight is essential for these sun-loving plants.
- Soil pH: Squash plants prefer slightly acidic to neutral soil, so ensure a pH level between 6.0 and 7.0.
Pros and Cons:
While homemade squash fertilizer is cost-effective and environmentally friendly, it may not offer the same exact nutrient balancing that commercial brands do.
Pro Tip:
Remember, the key to healthy squash plants lies in balancing all the above elements alongside a good fertilization routine. Happy Gardening!
Key Takeaway:
- Squash plants have specific nutritional requirements, necessitating higher levels of Nitrogen, Phosphorus, and Potassium than other common garden vegetables.
- Homemade squash fertilizers can be made using everyday household waste, such as coffee grounds, banana peels, and bone meal or crushed eggshells.
- Homemade squash fertilizer is gentle on plants, cost-effective, and more environmentally friendly than commercial fertilizers.
- Squash plants require additional care beyond fertilization, including consistent watering, pest management, adequate sunlight, and optimal soil pH.
Gardening, indeed, is a rewarding venture, and with this guide, you’re one step closer to achieving successful and robust squash plants. Continue nurturing your garden with patience and love. Always remember that balance is crucial, and knowing what your plants need will lead to healthier plants and a bountiful harvest.
FAQs
Q: Can I use other kitchen waste for making fertilizer?
A: Absolutely! Many kitchen wastes are nutrient-rich and can be excellent additives for your homemade fertilizer like vegetable peels, teabags, and even some types of paper products.
Q: How often should I apply the homemade squash fertilizer?
A: A good practice is applying a spoonful of fertilizer during planting, once every two weeks during the growth period, and a generous application before flowering.
Q: Is homemade squash fertilizers suitable for other plants as well?
A: Generally, yes, but keep in mind that different plants may have different nutrient requirements. Always understand the nutrient needs of your plants before fertilizing.
Q: Can I store my homemade squash fertilizer for a long time?
A: Homemade fertilizers usually have a long shelf-life when kept in a cool, dry area away from sunlight. However, for the best results, it is recommended to use the fertilizer as fresh as possible.
Q: Is it safe to touch the homemade fertilizer?
A: Homemade fertilizers made from household waste are generally safe to handle. Nevertheless, it is always recommended to wear gloves to avoid any possible skin irritation.
Share with fellow gardening enthusiasts, and explore more exciting posts on our website to make your gardening journey a success. Don’t forget the joy gardening brings you, and let the learning process guide you to advanced techniques and better yields. Happy gardening!